For each contact we add, we will need to fill out the form with all the data we want to have about them. It is the slowest process and is more useful for testing and modifying specific fields of specific contacts, but never for managing a large volume of actions.
If, on the other hand, you prefer to perform a bulk import of contacts, visit this article: https://mdirector.zendesk.com/hc/en-us/articles/16421272605084-How-to-import-contacts-to-MDirector-via-files
Before adding contacts manually, you must create a contact list or access the "General" list. If you haven't done this yet and don't know how, visit this article: https://mdirector.zendesk.com/hc/en-us/articles/6693916588946-Contact-List-Management
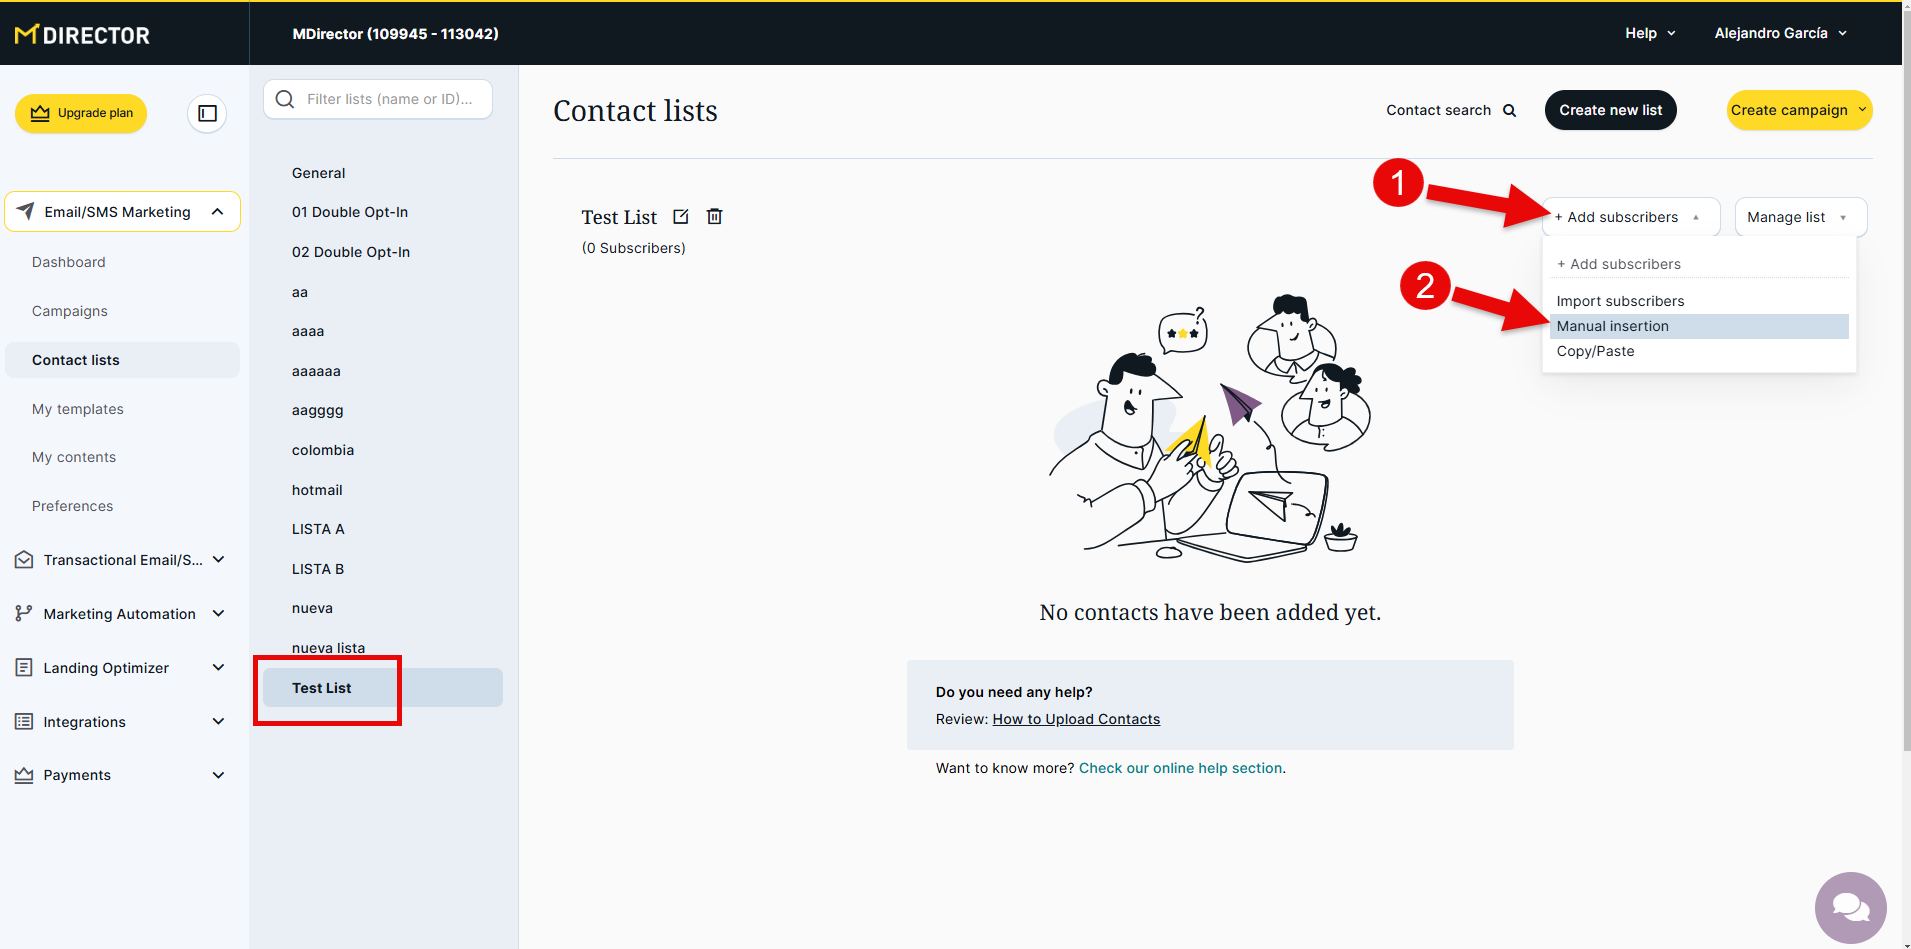
1. To access the contact creation form, open the "Add contacts" dropdown and select "Manual entry" within the list where we want to add the contact. This list is visible in the second menu on the left side
2. The form will open with the fields to fill out in order to create the contact
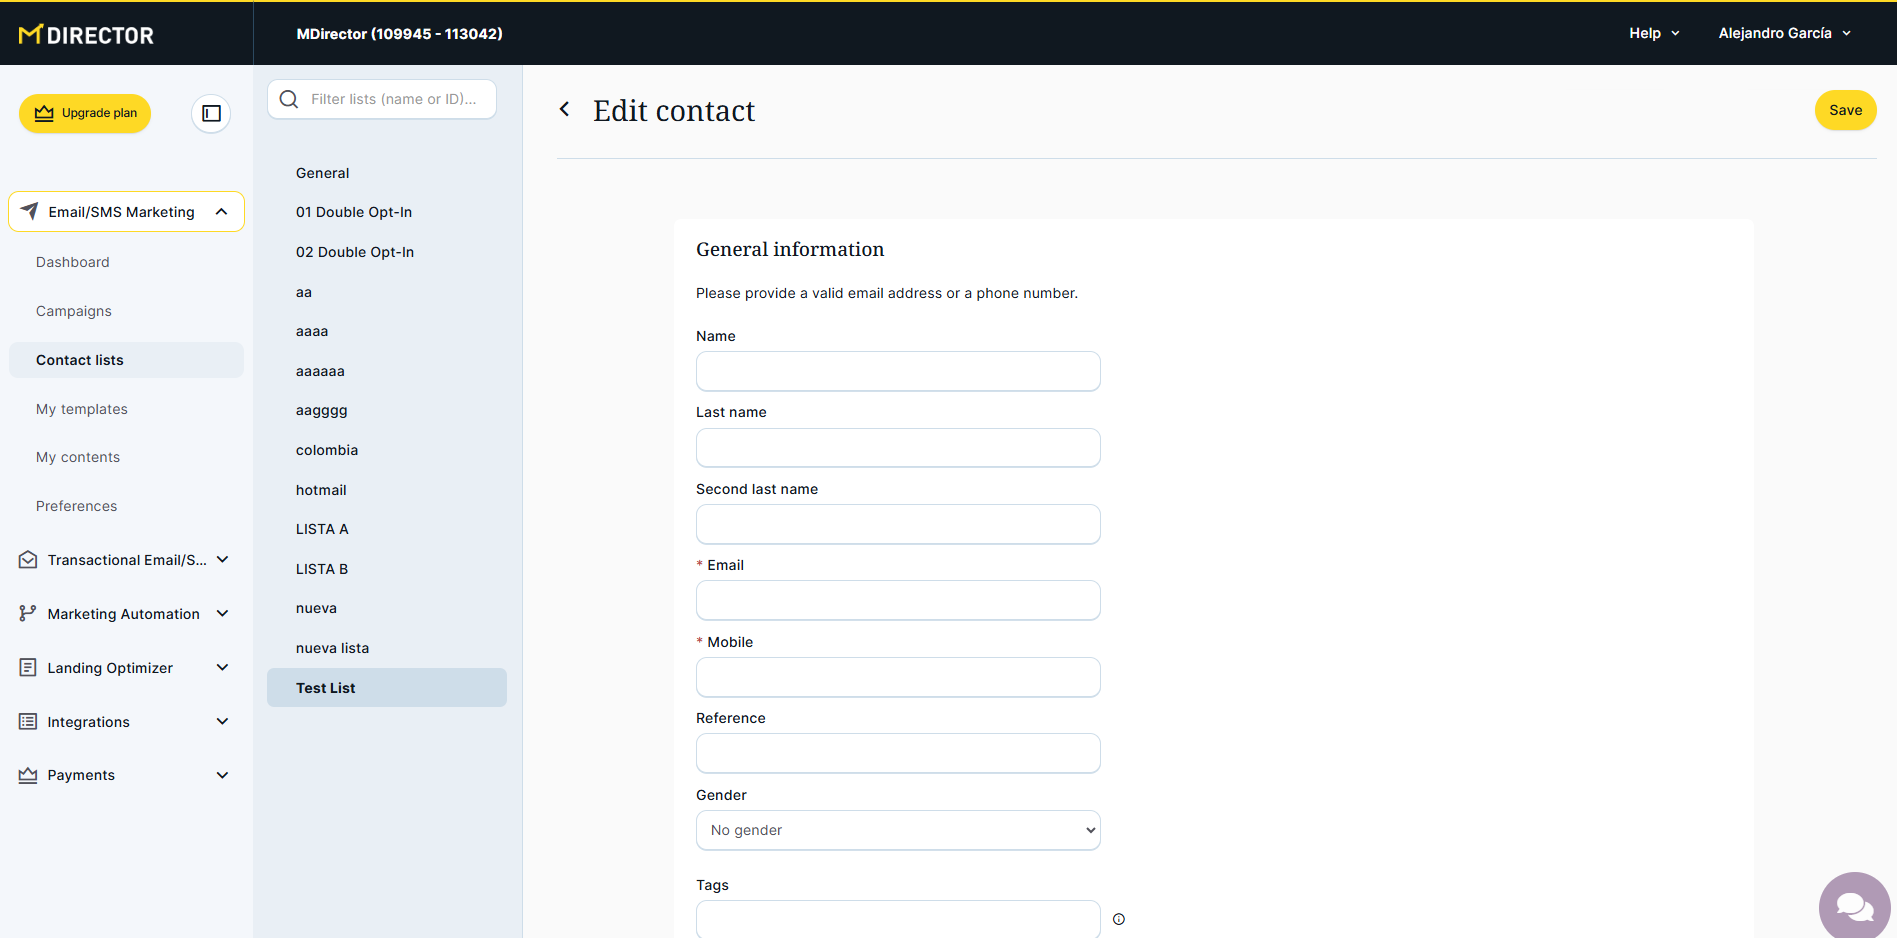
It is important to understand that in order to successfully create a contact, at least the email address or phone number of the contact must be provided. You need to fill in one of these two fields, or both, but never leave both empty.
Regarding the other fields, in addition to knowing that all of them are optional, it is important to differentiate between the standard fields provided by MDirector and the custom fields we can add. If you want to learn how to create custom fields, visit this article: https://mdirector.zendesk.com/hc/en-us/articles/201944212-How-to-create-custom-fields
The standard fields in MDirector are:
- Name
- Last name
- Second last name
- Email
- Mobile
- Reference
- Gender *
- Tags
- Date of birth *
- Country *
- State *
- City
- Zip code
* These fields must be created with a specific format or value. Find more information in this article: https://mdirector.zendesk.com/hc/en-us/articles/204780612-Table-of-Codes-Country-State-Gender-and-Date
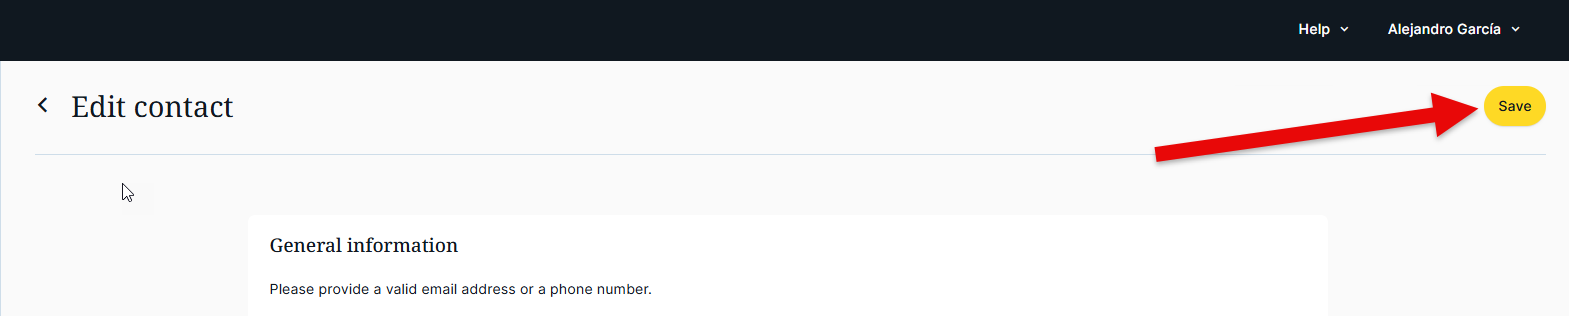
To save the information from the form, it is very important to remember to click the yellow "Save" button, which is visible both in the header and the footer of the page. If you click the back button or leave the page in any other way, the contact information will not be saved, and the contact will not be created.

If, once created, you want to make any manual modifications to the values of any of the fields, you can edit it
Comments